Understanding the Match Board
Understanding Board 2.0
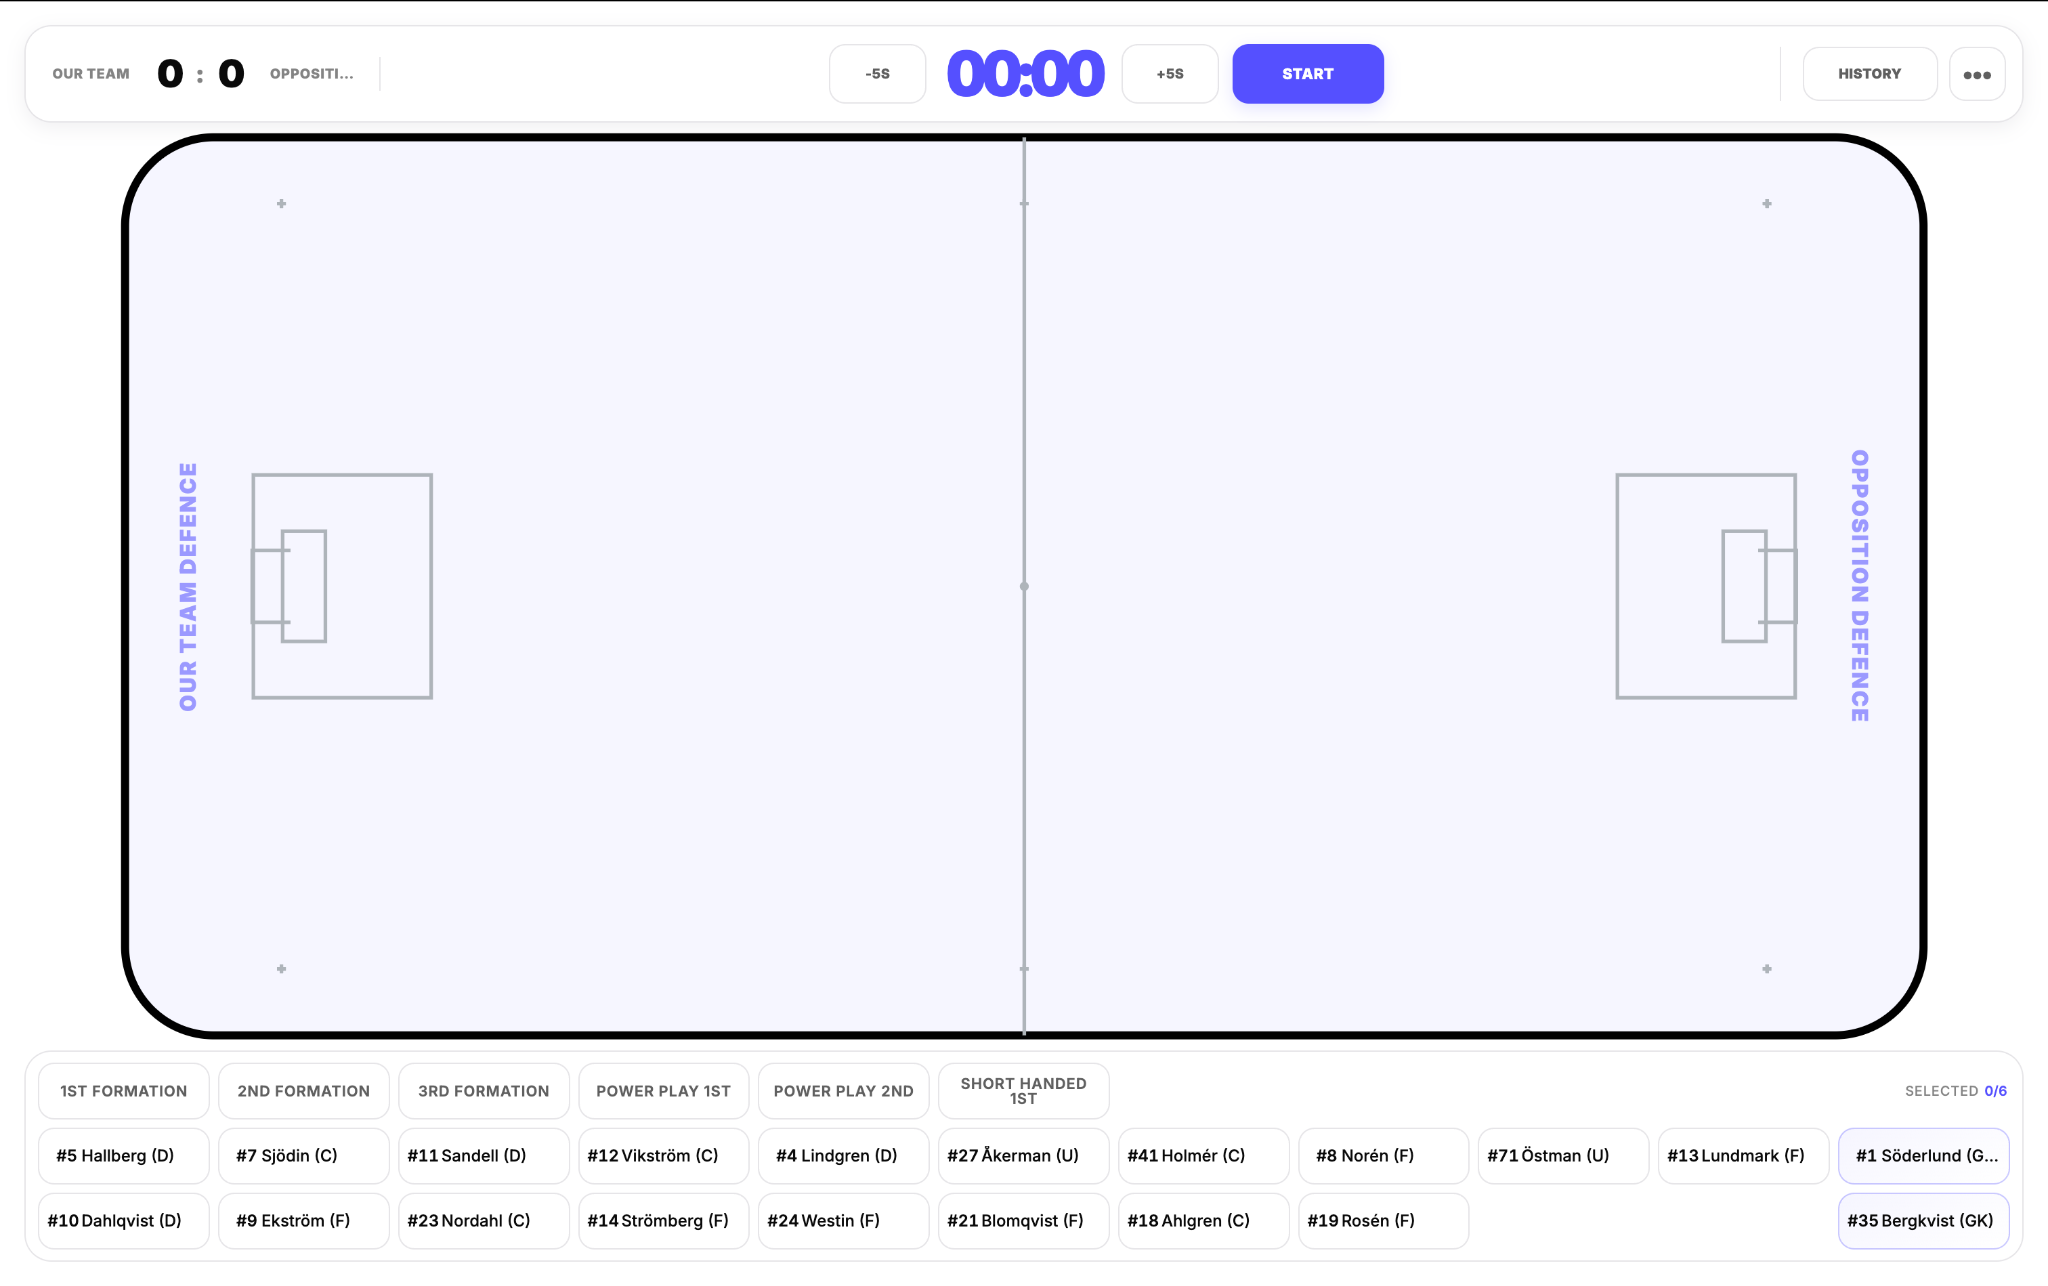
Board 2.0 reorganizes Match Tracking around three clear areas and gives more space to the actions you use most often.
1. Top Bar
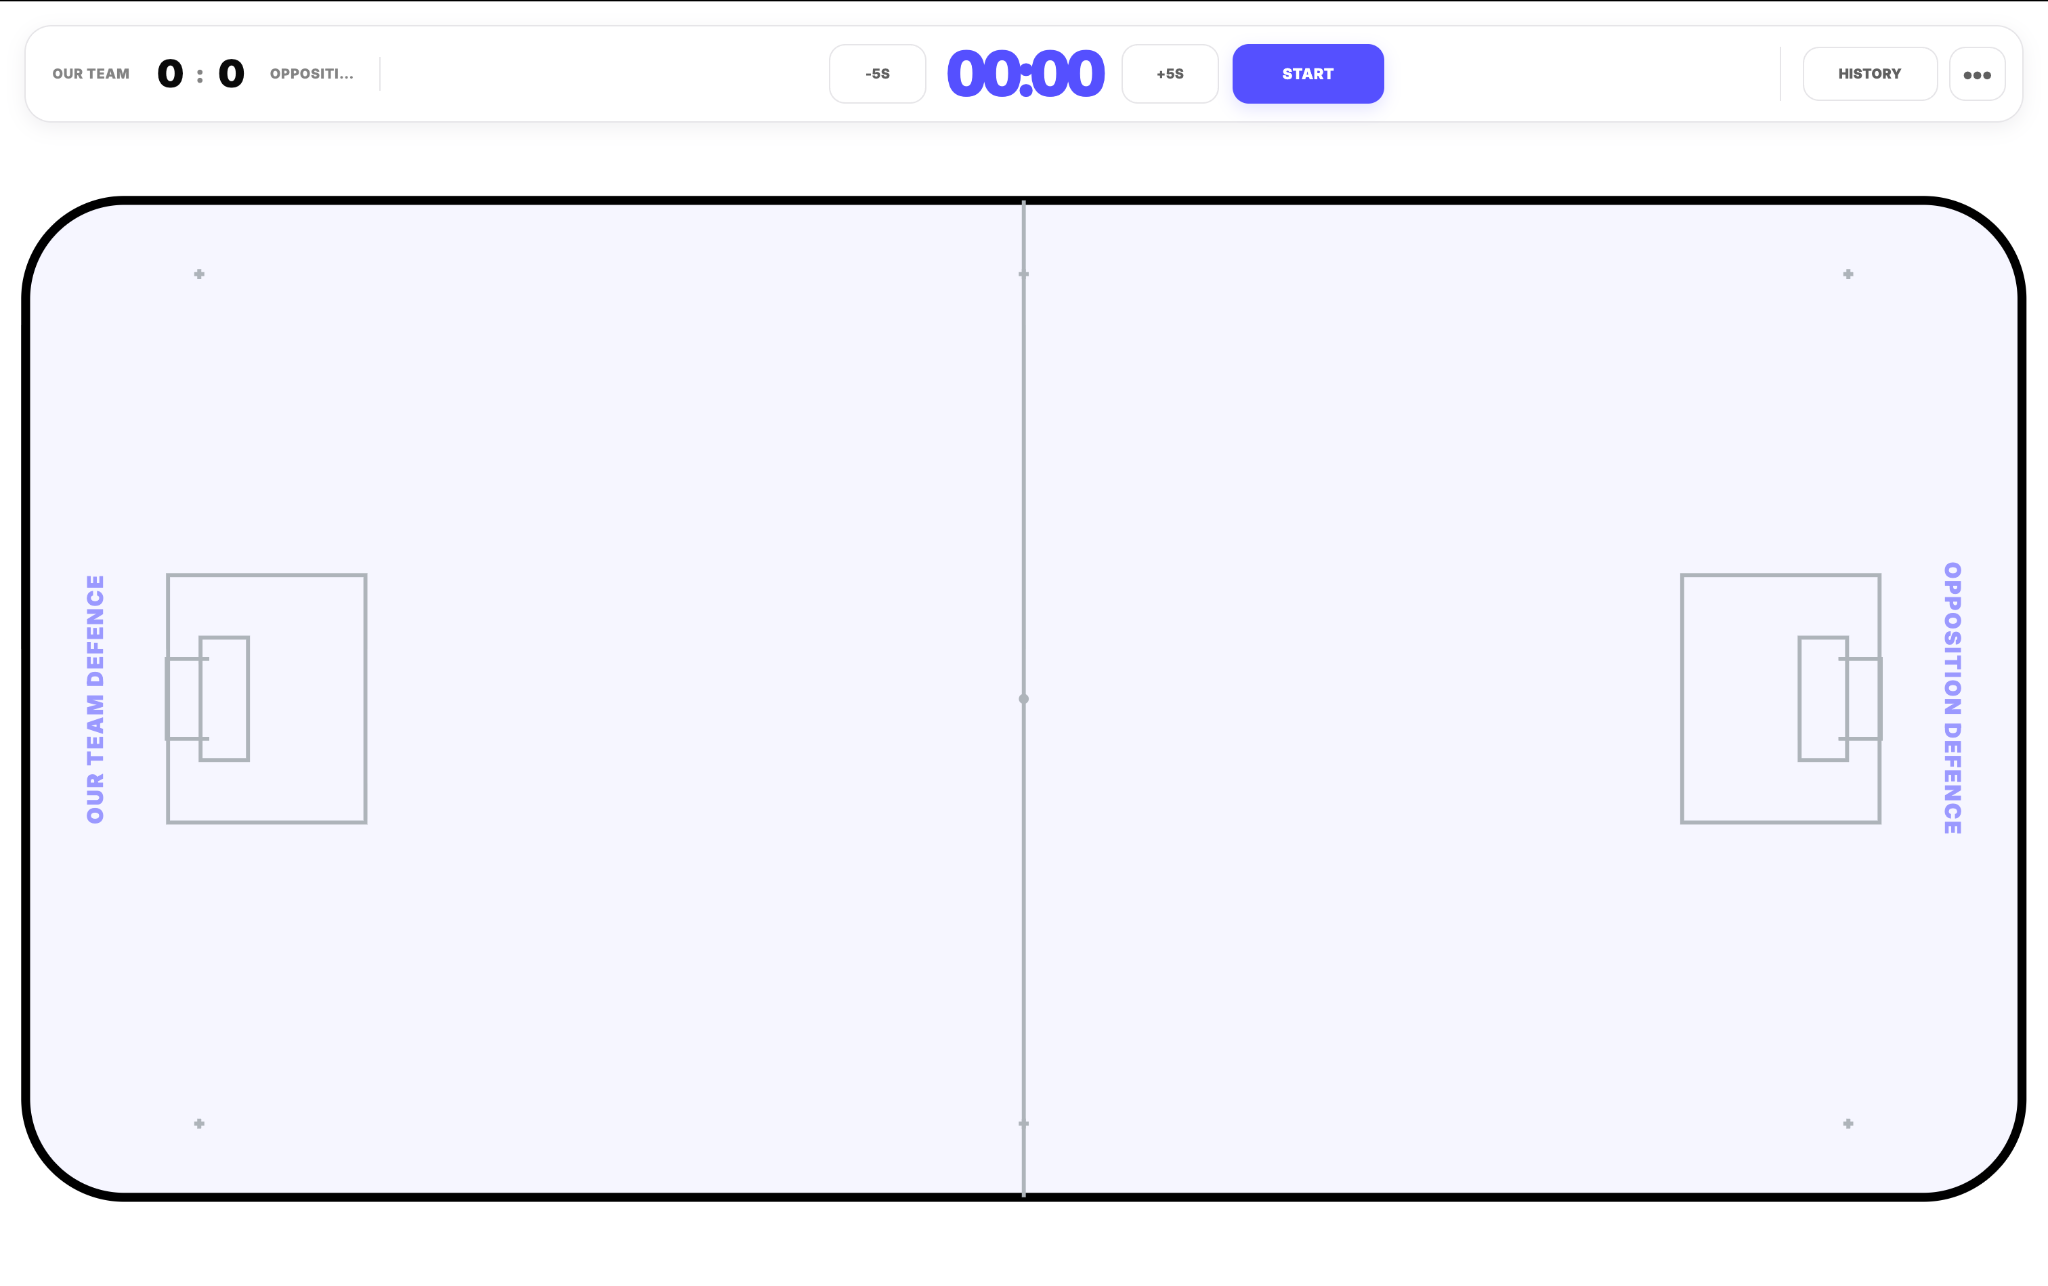
The top bar contains score, match clock, Start/Stop, five-second time correction, History and the main Menu. Less frequently used workflows remain available without permanently taking space away from the field.
2. Larger Field
The field is now larger and its proportions and visual treatment more closely reflect a real floorball rink. It remains the main spatial area for recording events.
3. Player & Lineup Bar
The bottom bar is dedicated to player time and lineup handling. Select individual players on the floor or use lineup hotkeys for fast full-line changes.
Recording a Basic Event
Most Match Board events follow the same basic workflow.
Step 1 — Select the Position
Click the position on the field where the event occurred.
This opens the Event popup.
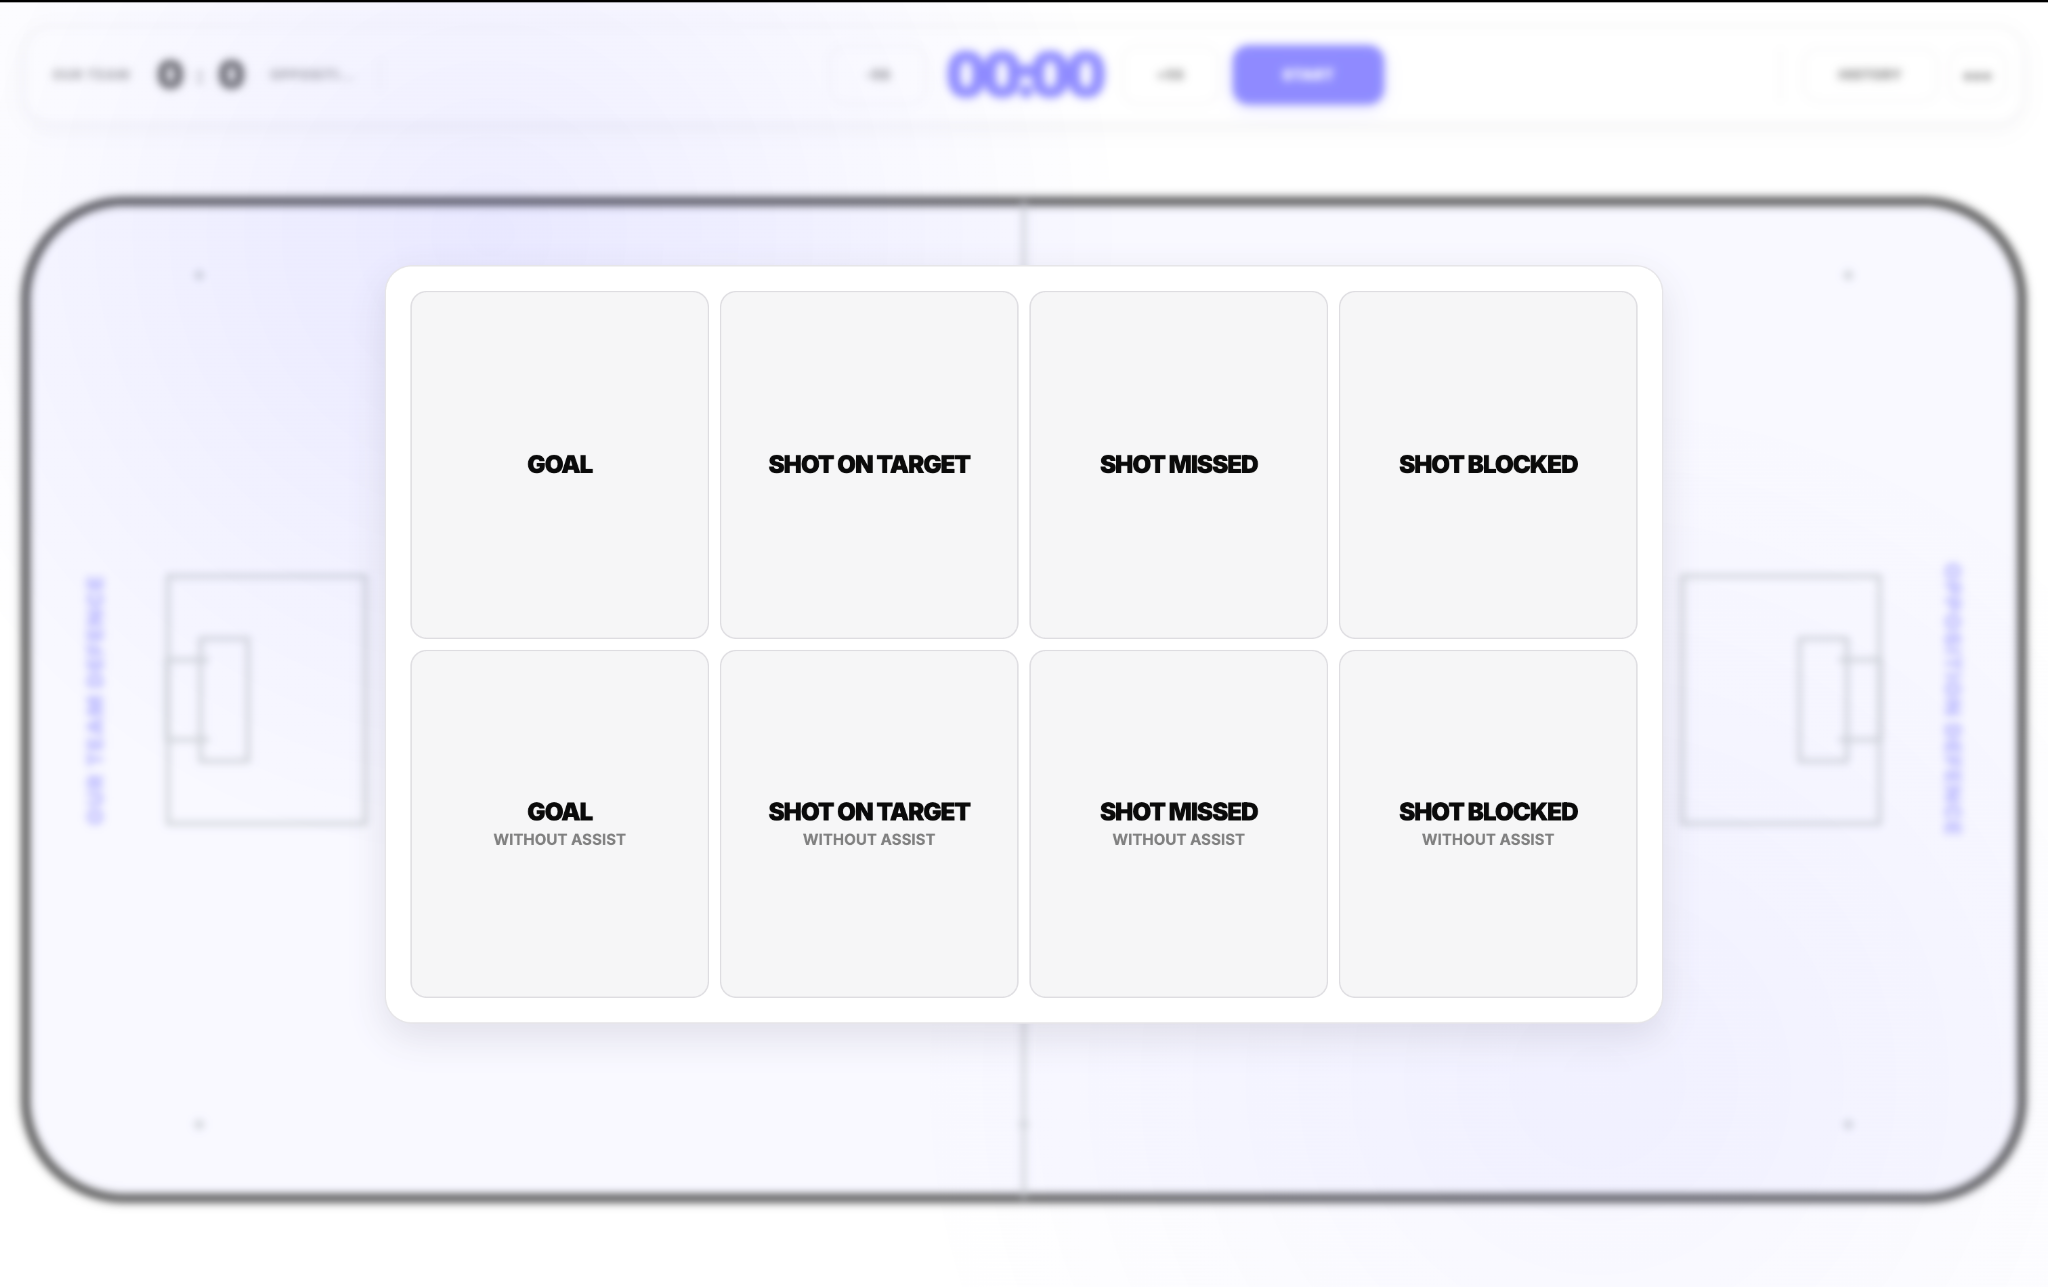
Step 2 — Select the Event Type
Choose the relevant Event Type from the available events.
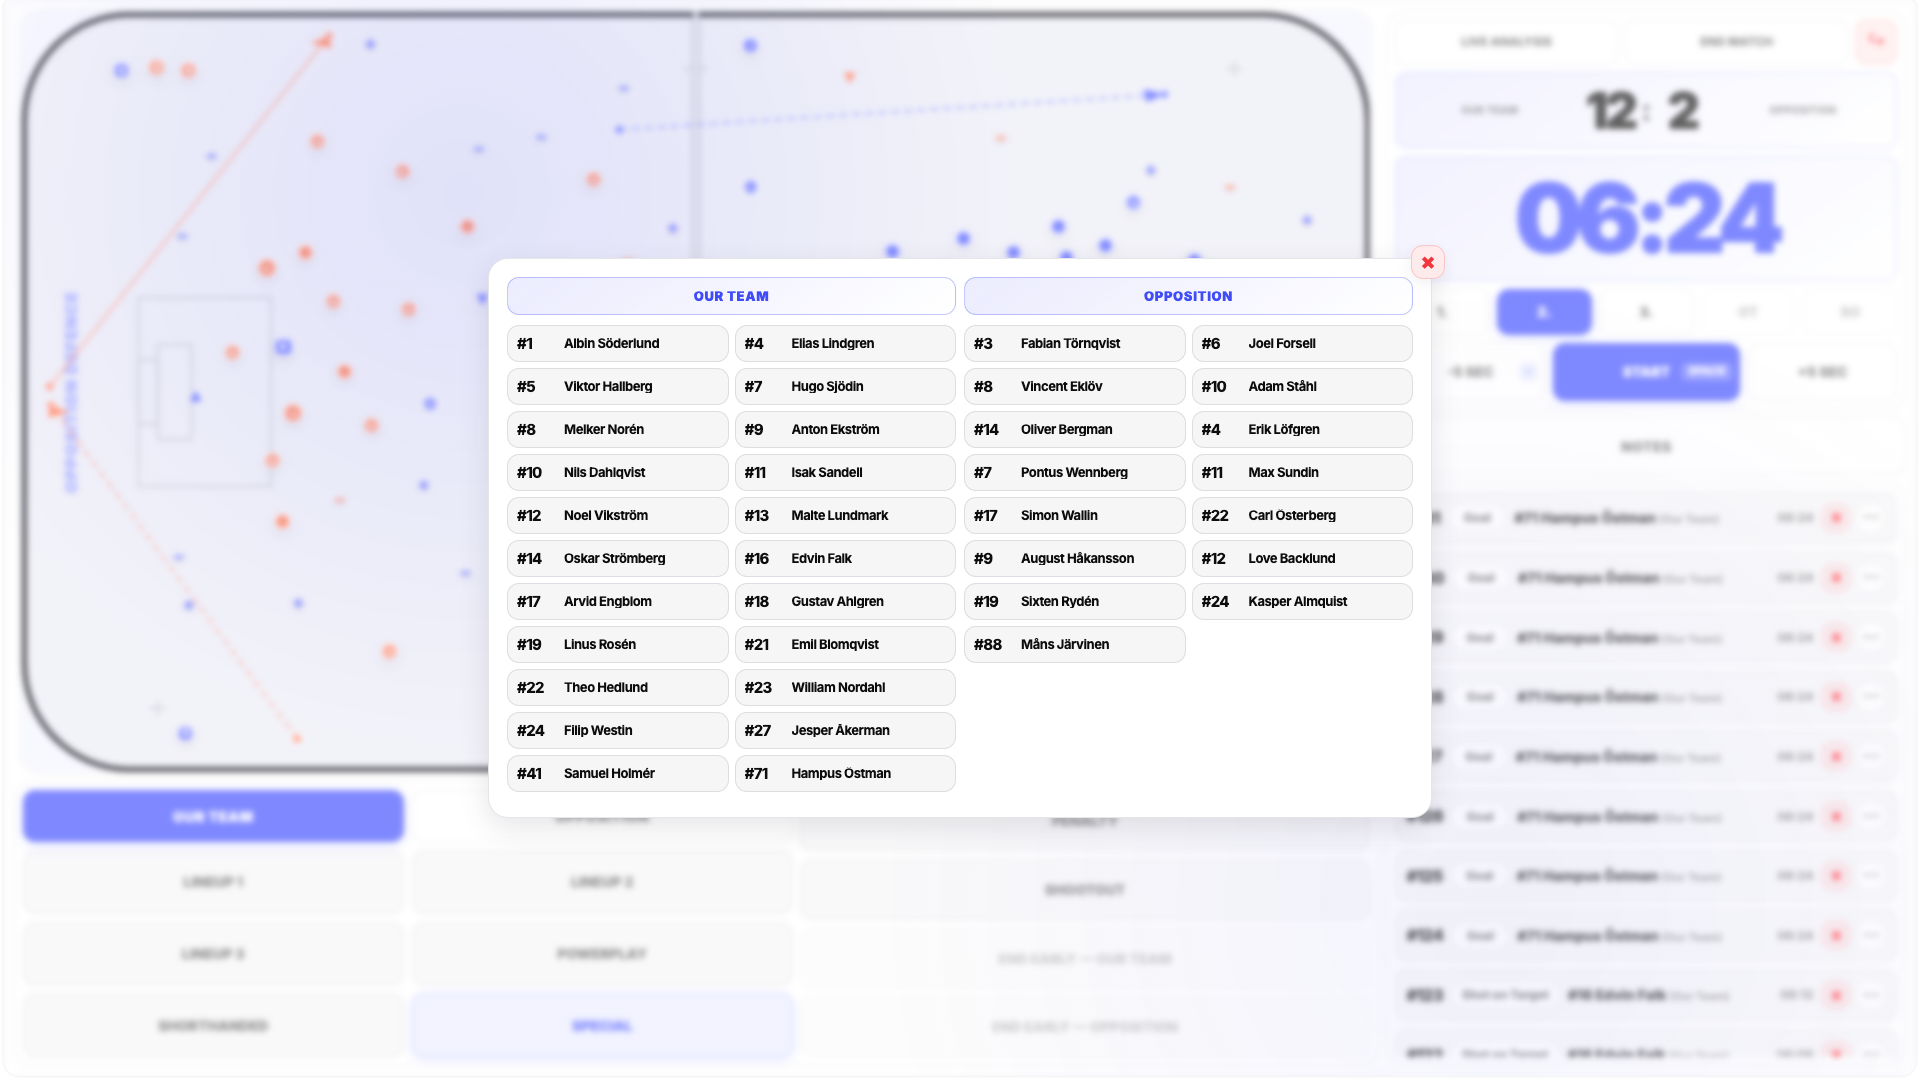
Step 3 — Select the Player
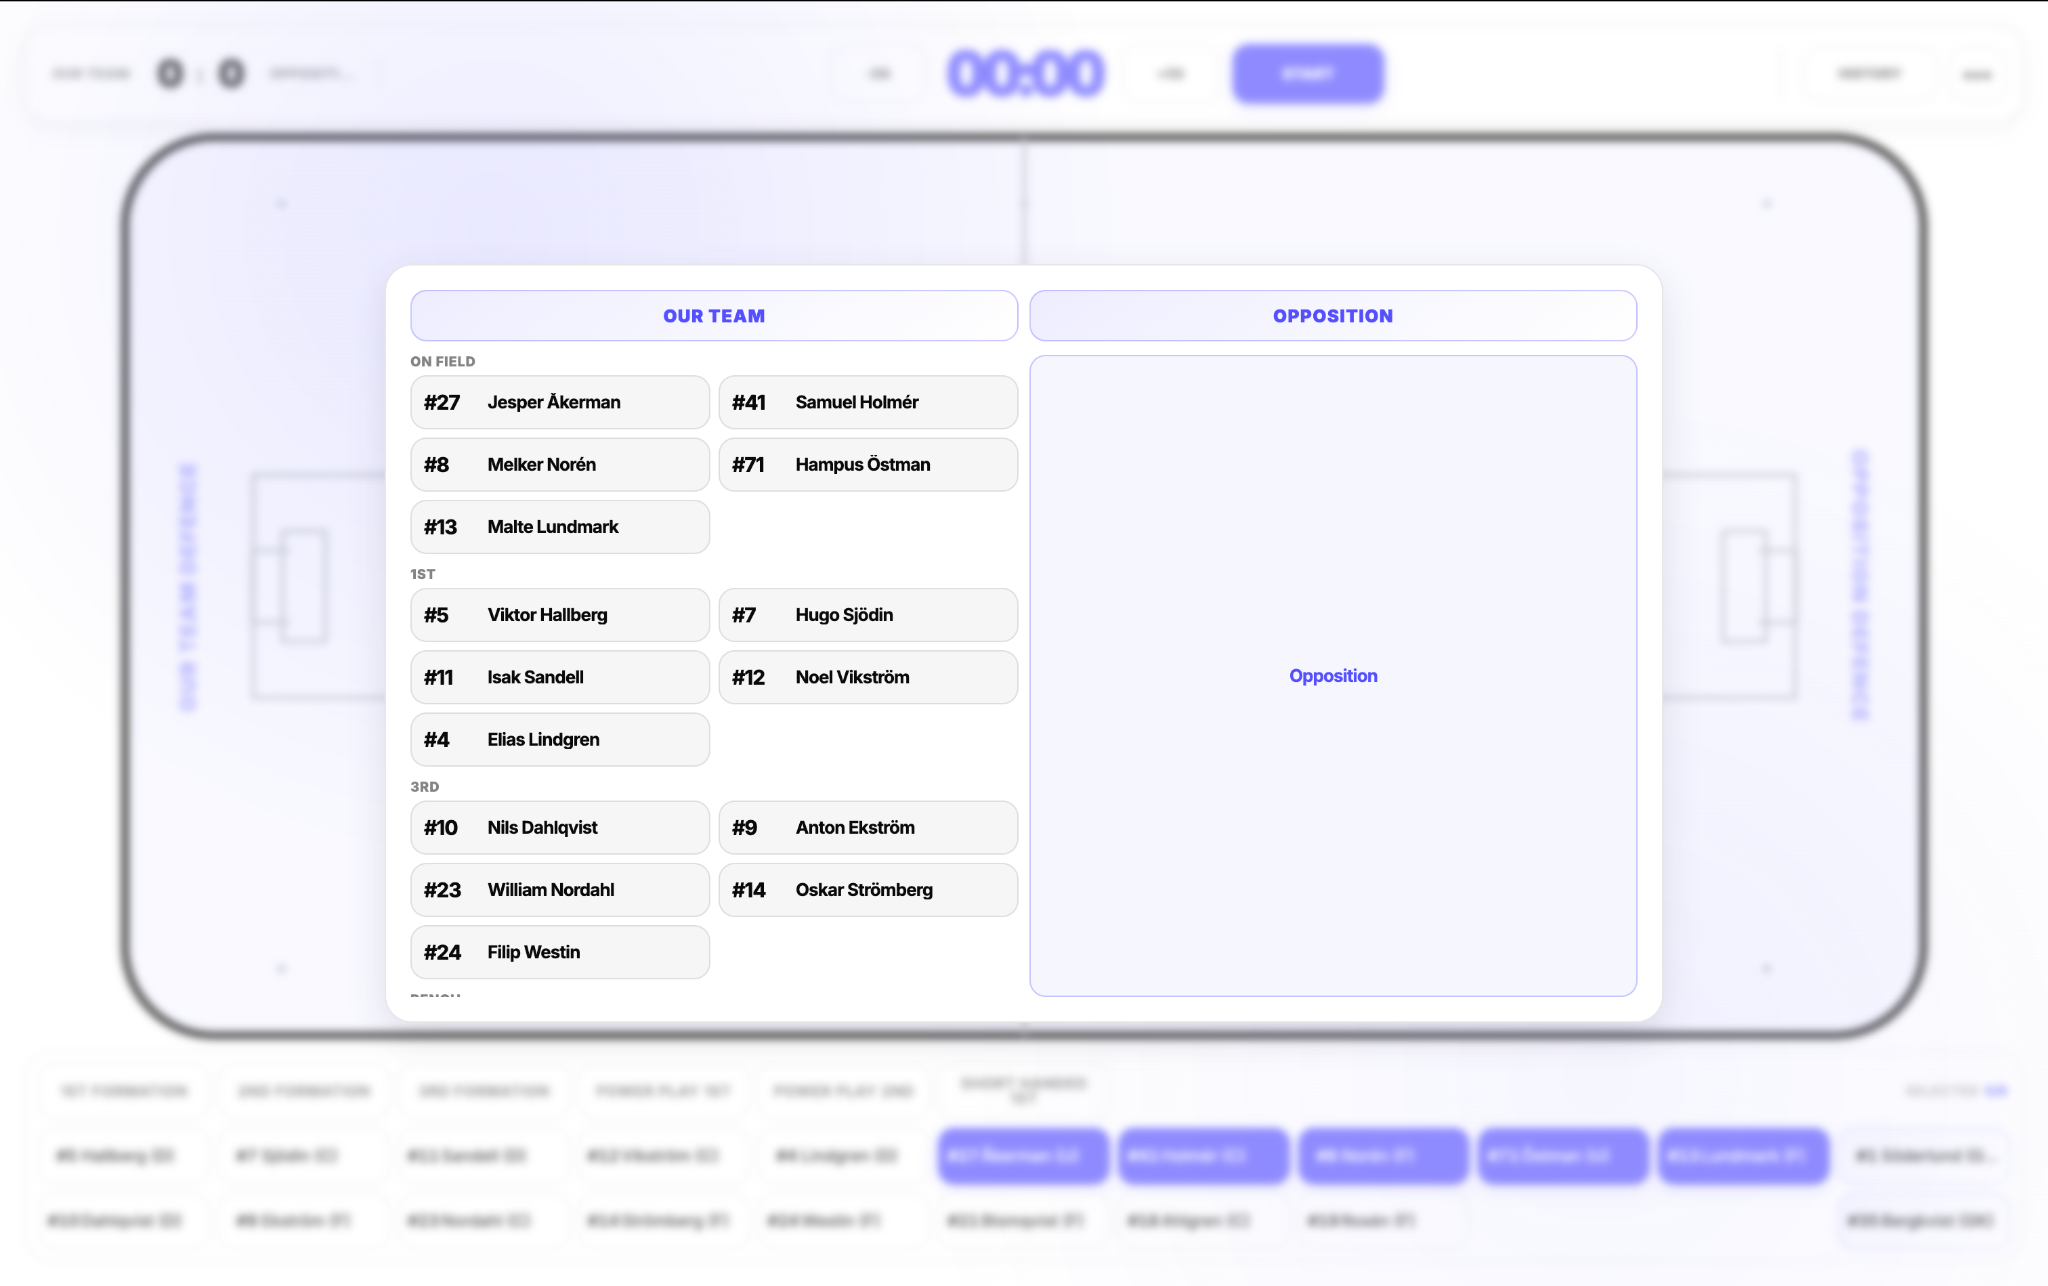
A player selection opens for Our Team and Opposition.
Select the player who performed the action.
The event is then recorded.
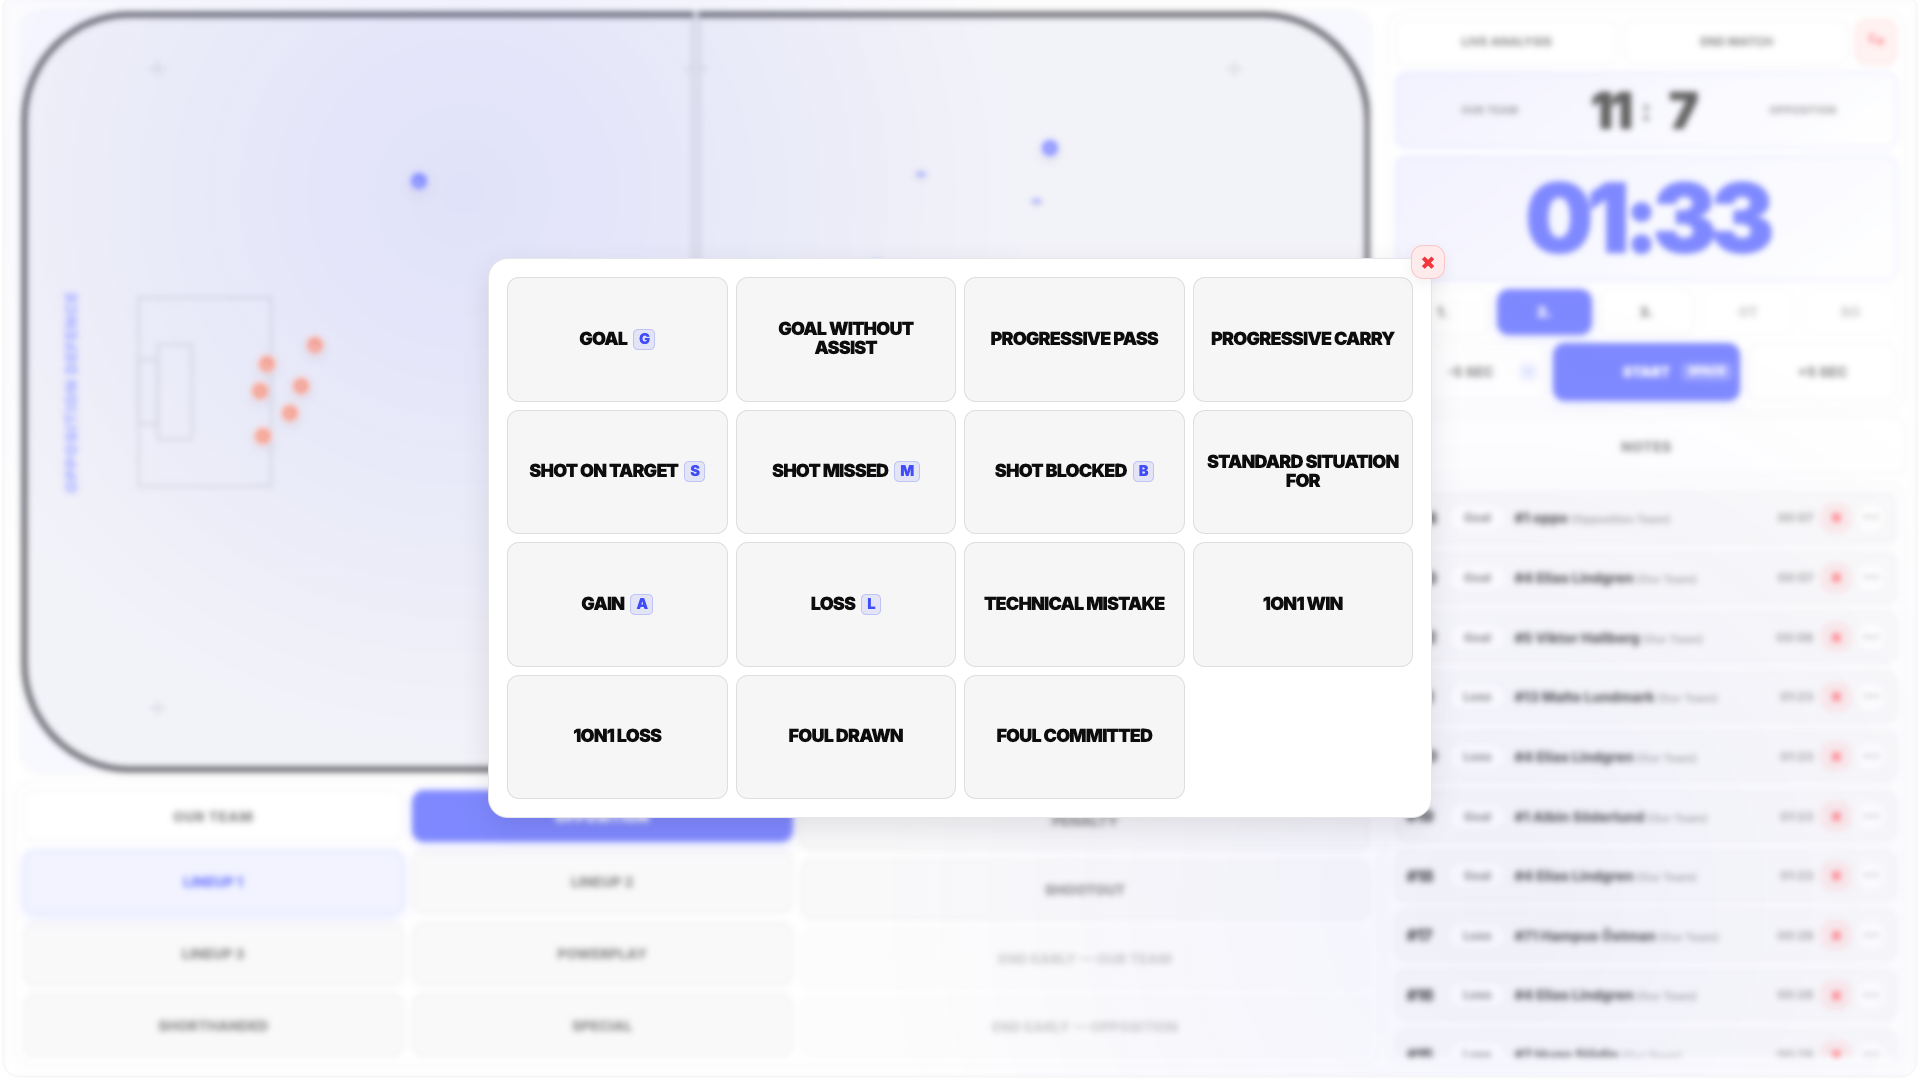
This basic structure is used for events such as:
- Goal without Assist
- Shot on Target
- Shot Missed
- Standard Situation
- Gain
- Loss
- Technical Mistake
- 1v1 Win
- 1v1 Loss
- Foul Drawn
- Foul Committed
Some Event Types require additional information and therefore use an extended workflow.
Recording a Goal and Assist
A standard Goal workflow also allows you to record the assist and the path of the pass leading to the goal.
Step 1 — Select the Goal Position
Click the position on the field where the goal was scored.
Step 2 — Select Goal
Choose Goal from the Event popup.
Step 3 — Select the Goalscorer
Select the player who scored.
After selecting the goalscorer, FloorballStats automatically activates Assist Mode.
Step 4 — Select the Assist Position
Click the position on the field from which the assisting pass was played.
Step 5 — Select the Assistant
Choose the player who made the assist.
The Goal is now recorded together with the goalscorer, assistant and the spatial path of the assist.
Goal without Assist
If the goal did not have an assist, use Goal without Assist instead of Goal.
This records the goal without starting the additional Assist Mode workflow.
Do not select Goal if you know there is no assistant. Use Goal without Assist so the event can be completed correctly without the assist step.
Recording a Progressive Pass
Progressive Pass stores both where the action started and where it ended.
Step 1
Click the starting position of the pass.
Step 2
Select Progressive Pass.
Step 3
Select the player who made the pass.
Step 4
Click the ending position of the action.
Only after the ending position is selected is the complete event recorded.
A Progressive Pass is not saved before its ending position has been selected.
Recording a Progressive Carry
Progressive Carry uses the same start-to-end structure.
First select the position where the carry began.
Choose Progressive Carry and select the player.
Then click the position where the progressive action ended.
This allows FloorballStats to store the movement of the action rather than only one point on the field.
Recording a Shot Blocked
Shot Blocked requires information about players from both teams.
First click the position from which the blocked shot was taken.
Select Shot Blocked and choose the shooter.
A secondary player selection then opens.
Select the player from the other team who blocked the shot.
The event is stored with both the shooter and the blocking player.
Event Markers
Every Event Type has its own visual symbol.
These symbols are used consistently across the application, making it easier to recognize event types on the Match Board and in later analytical views.
Event Markers are also colour-coded by team:
- Our Team events are displayed in purple.
- Opposition events are displayed in orange.
The number of visible markers can be controlled in Settings using Hide Past Events and Event Marker Visibility.
Tracking Lineups
Player Time & Lineup Tracking
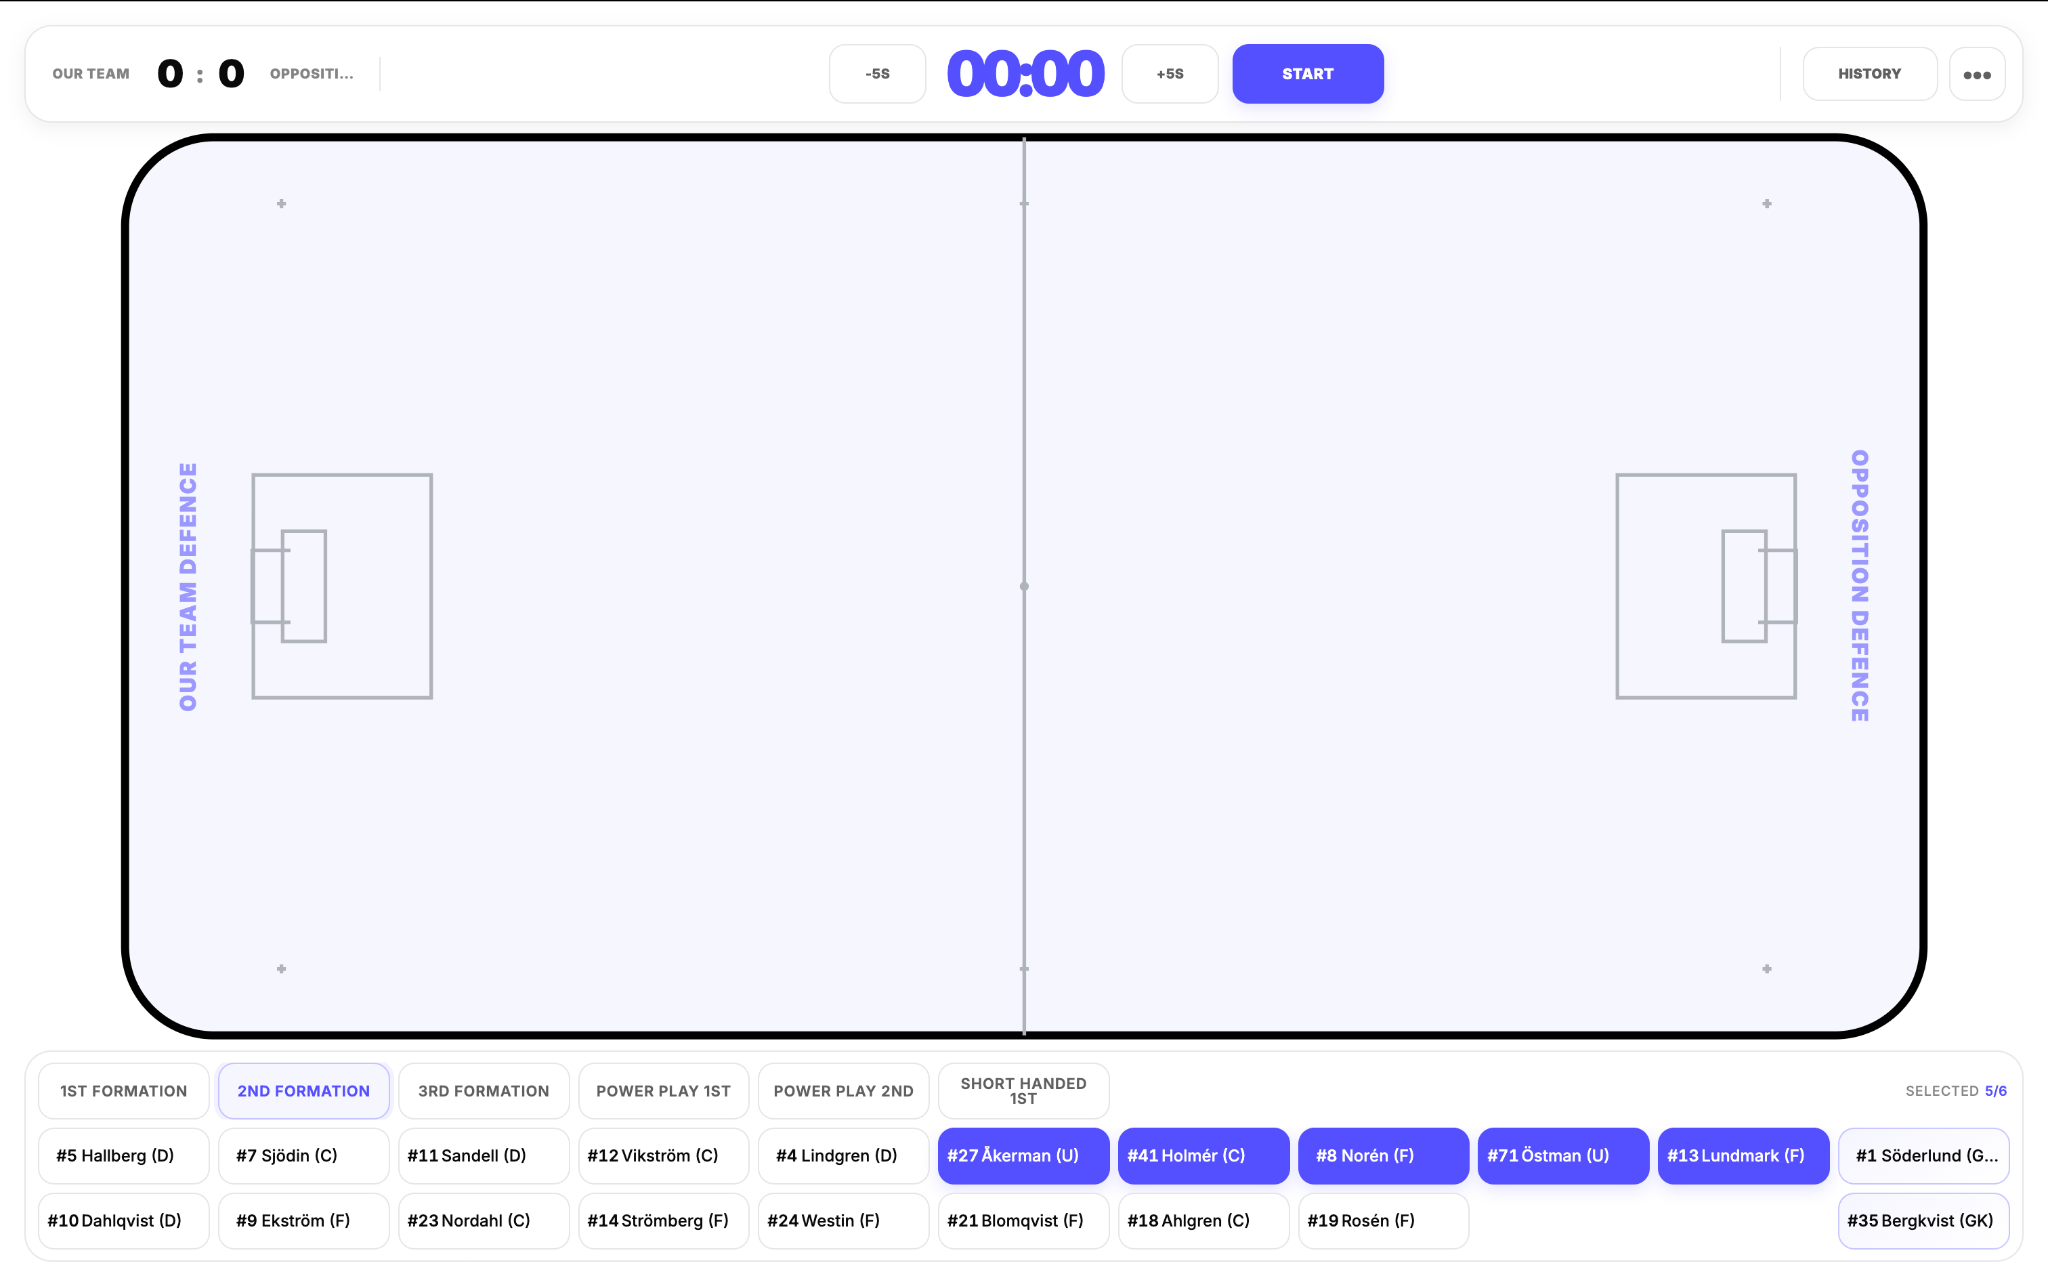
Board 2.0 makes time-on-field tracking player-specific. You no longer need to keep an entire predefined lineup active just to track player time.
Click individual player tiles in the bottom bar to set who is currently on the floor. Active players are highlighted in purple.
Lineup Hotkeys
If a full predefined formation enters the field, click its lineup hotkey above the player tiles. The formation is selected together, and you can still adjust individual players afterwards.
Lineup Structure
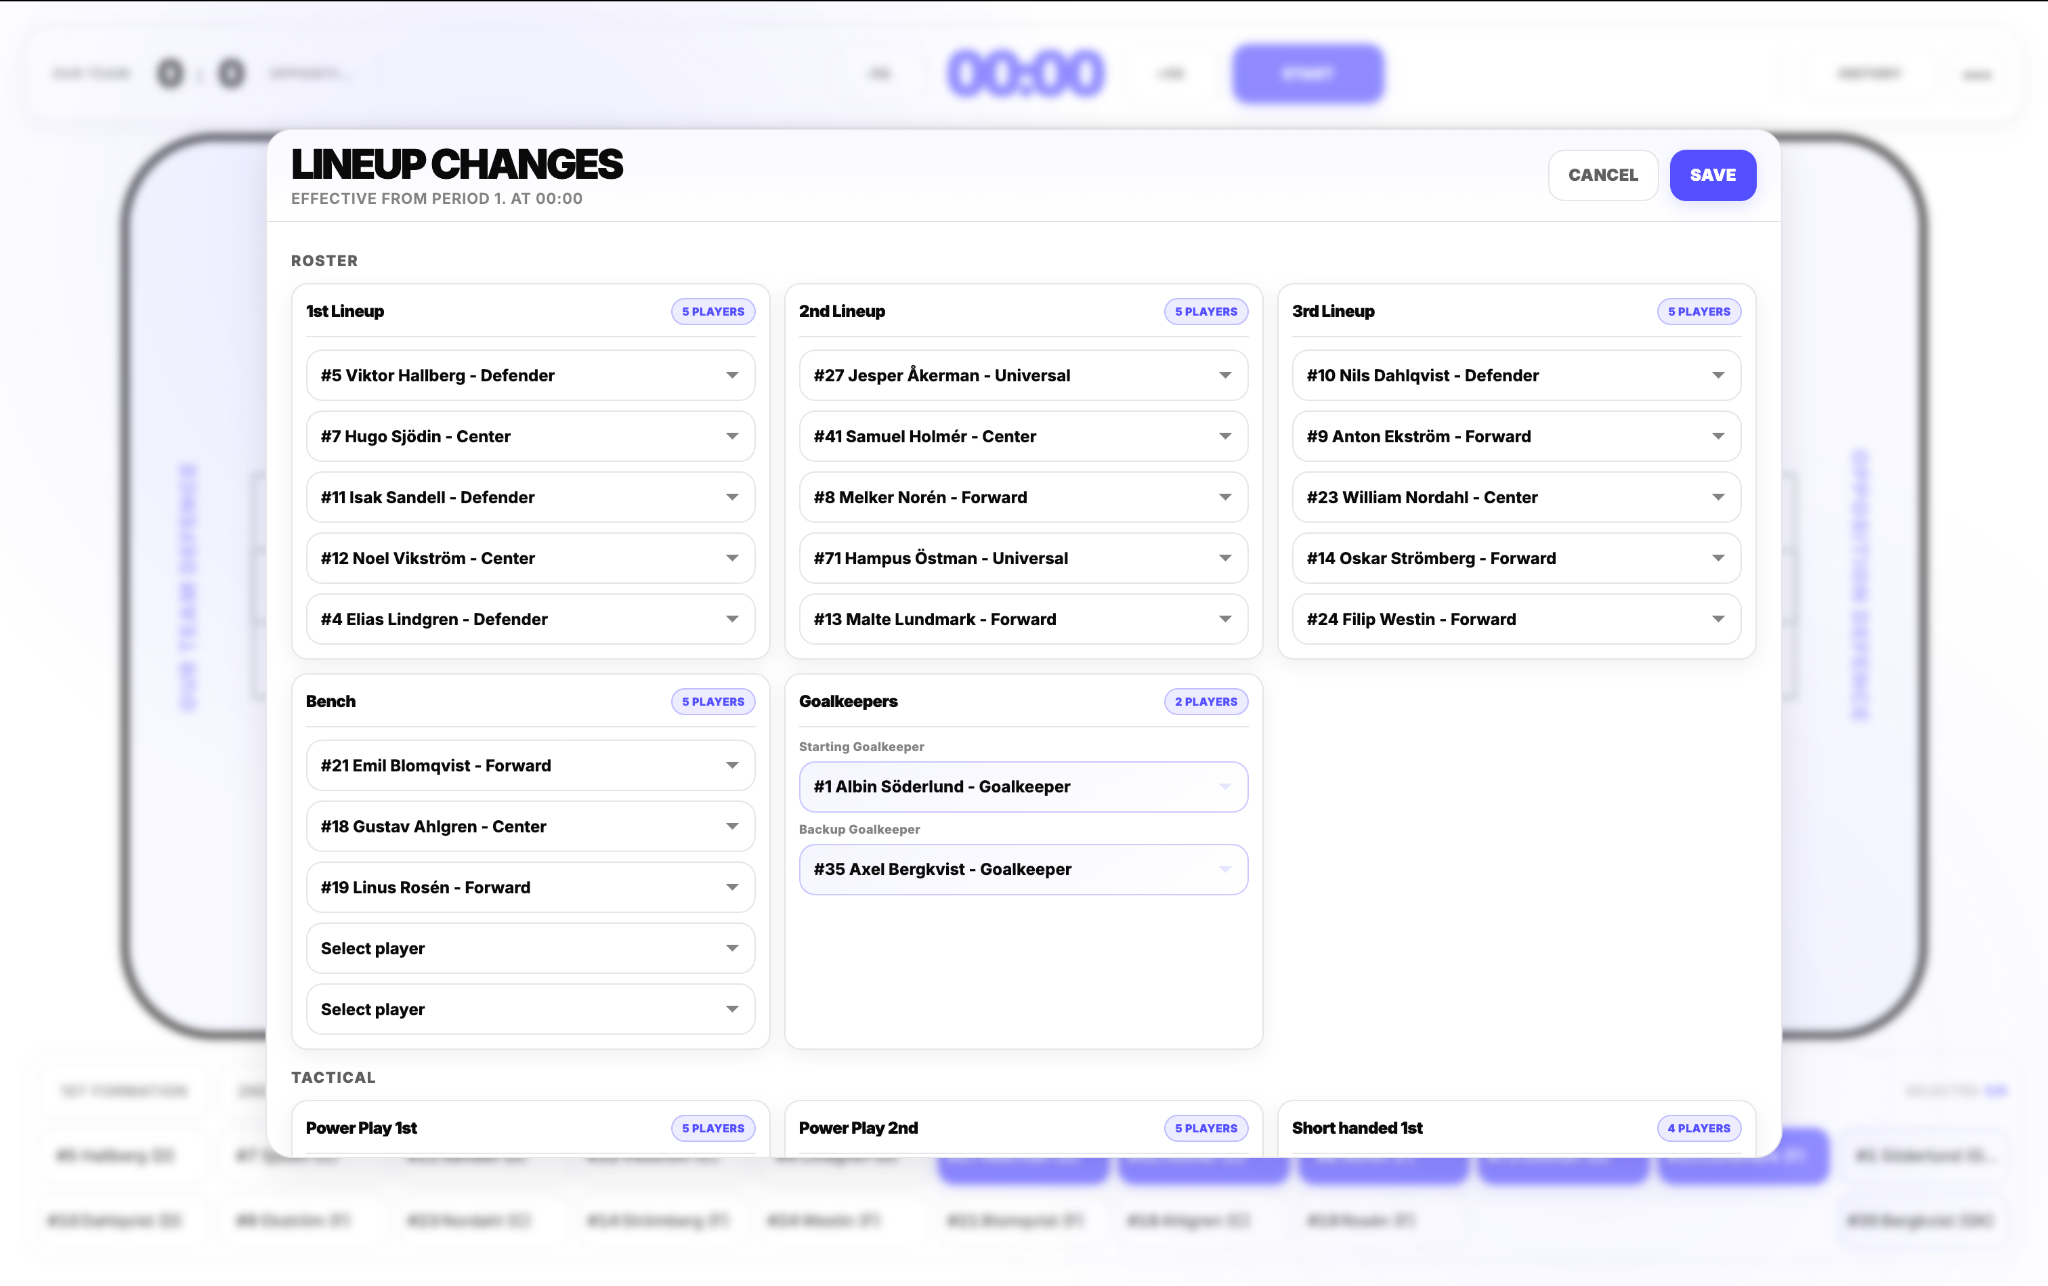
A Lineup Group can contain three standard lineups, two goalkeepers, up to five bench players, up to two Power Play lineups and up to two Short Handed lineups. Goalkeepers are managed separately as Starting Goalkeeper and Backup Goalkeeper.
Changing Lineups During a Match
Open Menu → Lineup Changes to update standard lineups, bench players, goalkeepers and tactical groups while the match is active.
Board Settings
Board 2.0 adds workflow settings that let you choose the level of tracking detail you need.
Shooting-only mode
Shows only shooting-related events. Shot markers use colour to indicate the result, and assists can also be tracked for shooting events other than goals.
Track Our Team Players / Opposition Players
Player attribution can be enabled separately for each team. Turn it off when you want team-level statistics without selecting a specific player for every event.
Track Only Our Team
Removes Opposition event selection. Combined with Track Our Team Players turned off, a standard event can be recorded in only two clicks: field position and event type.
Track Player Time
Turn this off if you do not need exact time-on-field tracking. The bottom player-time section disappears, while player event attribution and plus/minus tracking remain available.
Recording a Penalty
Penalties are opened from the main Menu so they do not take permanent space in the default Board view.
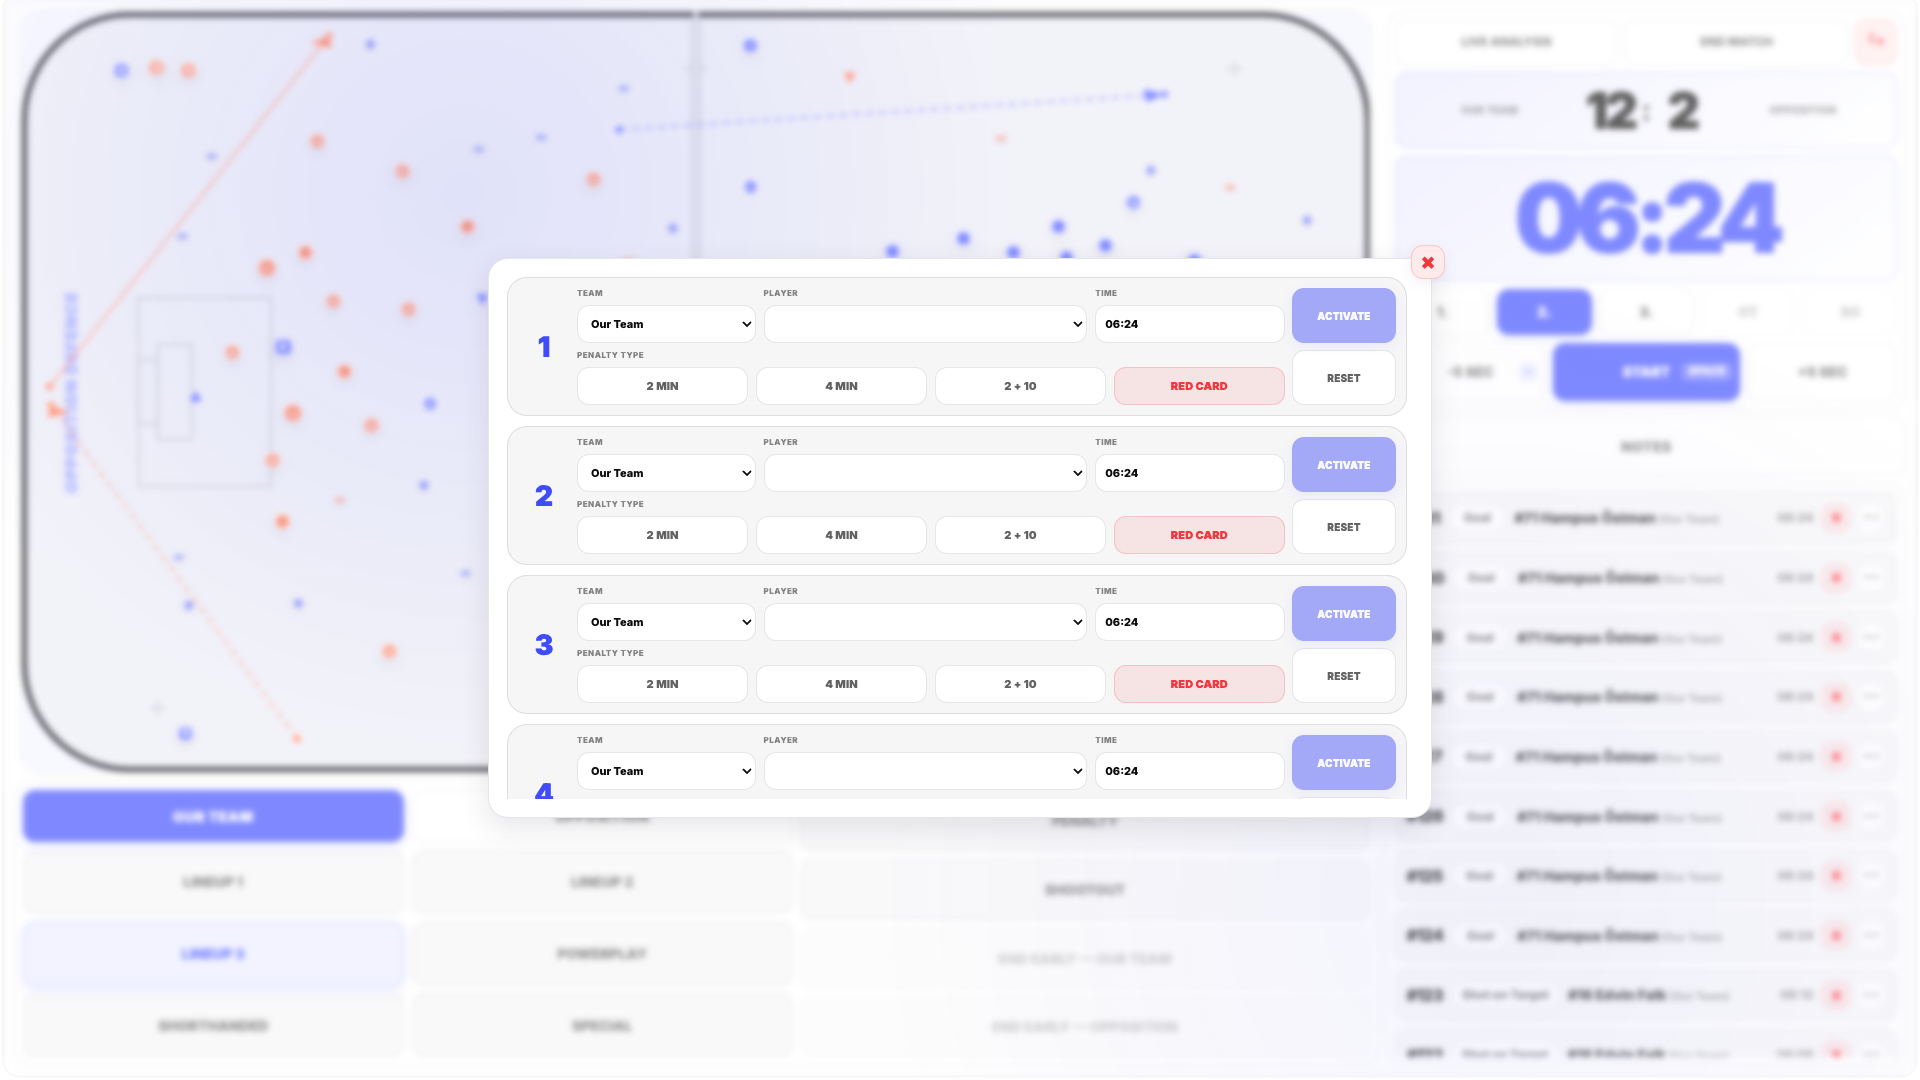
Step 1 — Select the Team
Choose whether the penalized player belongs to Our Team or Opposition.
Step 2 — Select the Player
Choose the specific player receiving the penalty.
Step 3 — Check the Start Time
The penalty start time is automatically pre-filled based on the time when the popup was opened.
You can manually edit the time if a correction is required.
Step 4 — Select the Penalty Type
Available Penalty Types include:
- 2 minutes
- 4 minutes
- 2 + 10 minutes
- Red Card
For a 2 + 10 penalty, the additional ten minutes represent a personal penalty, while the team is short-handed for two minutes.
Step 5 — Activate
Once the required information has been entered, click Activate.
The Penalty becomes active.
A configured penalty can also be reset or cancelled where required.
Ending a Penalty Early
While a penalty is running, the End Early action becomes available on the Board.
Use End Early when a penalty needs to finish before its originally defined duration.
A common example is a goal scored during a penalty when the applicable penalty should end according to the match situation.
Clicking End Early immediately ends the active penalty.
Recording Shootouts
Shootouts are opened from the main Menu. The underlying recording workflow remains the same.
The popup contains two tabs:
- In-Game
- Definitive
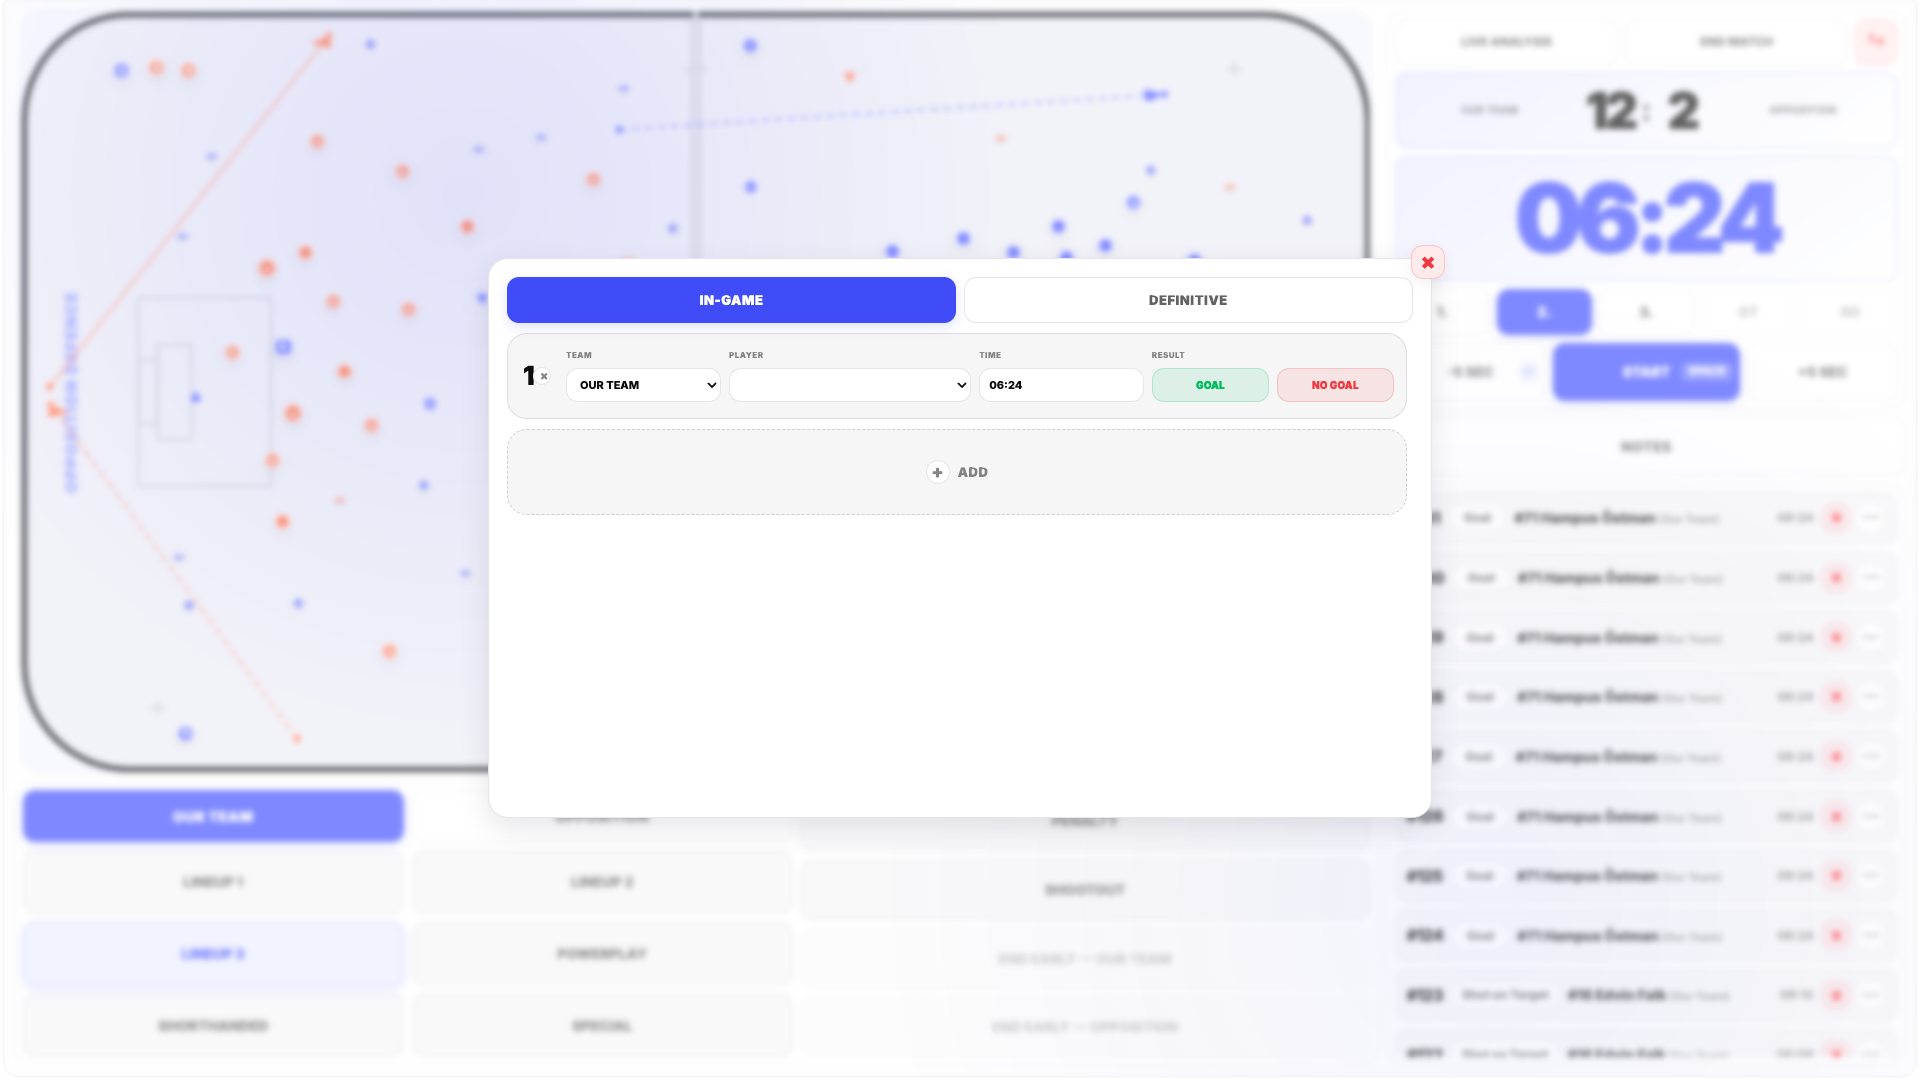
In-Game Shootout
In-Game is used for a shootout that takes place during normal game play.
Select:
- Team — Our Team or Opposition.
- Player.
- Time.
- Result — Goal or No Goal.
The time is automatically pre-filled but can be edited manually.
If the result is Goal, the goal is also reflected in the relevant overall match statistics.
Definitive Shootout
Definitive is used for the shootout sequence that decides the winner of the match after regulation and any relevant overtime.
You can track attempts separately for Our Team and Opposition.
For every attempt, choose the player and record the result as:
- Goal
- No Goal
Additional attempts can continue to be added as required, so the workflow is not limited to a fixed number of shootouts.
Score
The current score for Our Team and Opposition is displayed directly on the Match Board.
The score cannot be edited manually.
It is calculated automatically from the Goals and relevant Shootout results recorded in the application.
If the displayed score does not match the real game, check the recorded Goal and Shootout events rather than trying to edit the score directly.
Match Clock and Periods
The match clock is centered in the top bar and allows you to start or stop time and correct it in five-second steps.
Period switching is available from the main Menu. Switching periods clears the active on-floor player selection for the new period.
You can also switch between the individual periods of the match.
If a small correction is required, the current time can be adjusted manually in five-second steps.
You can:
- Add 5 seconds.
- Subtract 5 seconds.
The behaviour of period switching can also be affected by Settings such as Lock Period After End and Switch Sides After Period.
Notes
Click Notes to open the Notes popup.
You can freely write observations or other information during the match.
The notes are saved and later displayed in Match Detail.
This can be useful for recording context that is important to your post-match analysis but does not belong to a structured Event Type.
History & Event Feed
Click History in the top bar to open the updated chronological Event Feed.
History includes statistical events and contextual events such as penalties, empty-net situations and shootouts.
Selecting or interacting with an event also highlights the relevant Event Marker on the field.
Deleting an Event
Use the red X button to delete an event.
If Confirm Event Deletion is enabled in Settings, you will need to confirm the deletion before the event is removed.
Editing an Event
Click the three-dot action on an event to edit it.
Depending on the event, you can adjust information such as:
- Event Type
- Period
- Time
- Player
- Position
This allows tracking mistakes to be corrected without deleting and completely recreating the event.
Opening Live Analysis
Click Live Analysis from the Match Board to open the live statistical overview of the current match.
You can move between Match Board and Live Analysis as needed while the match is still in progress.
Leaving or Ending a Match
There is an important difference between leaving Match Tracking and officially ending the match.
Exit
Use Exit when you want to leave the Match Board without finalizing the match.
The match can remain available for continued tracking later.
End Match
Use End Match when the match is finished.
Clicking End Match opens the finalization popup.
Choose the official result:
- Win
- Win OT
- Loss
- Loss OT
The selected result is used when saving the completed match and calculating the appropriate points.
Excluding a Match from Statistics
During finalization, you can choose to exclude the match from statistics.
This can be useful for a match such as a Friendly Game that you want to keep in FloorballStats without including it in your main performance sample.
Excluding a match from statistics does not delete the match.
The match remains available in Match Archive and keeps its Match Detail.
However, it is excluded from long-term statistical areas such as Dashboard Overview, Player Detail, lineup statistics and Analytics.
Once the correct result and statistical inclusion option have been selected, click End Match to finalize the match.
Live Analysis
Live Analysis is designed for quick statistical review while a match is still being played.
It can be used during the game itself or between individual periods to understand what has happened so far without leaving the active Match Tracking workflow.
Navigation and Period Selection
Live Analysis contains controls for changing the statistical sample shown on the page.
You can view all currently recorded match data or focus on individual periods.
This makes it possible, for example, to compare what happened in the first period with the current overall match performance.
From Live Analysis, you can also:
- Return to the Match Board.
- Open Settings if you need to change a tracking configuration.
- Leave Match Tracking and return to the Dashboard.
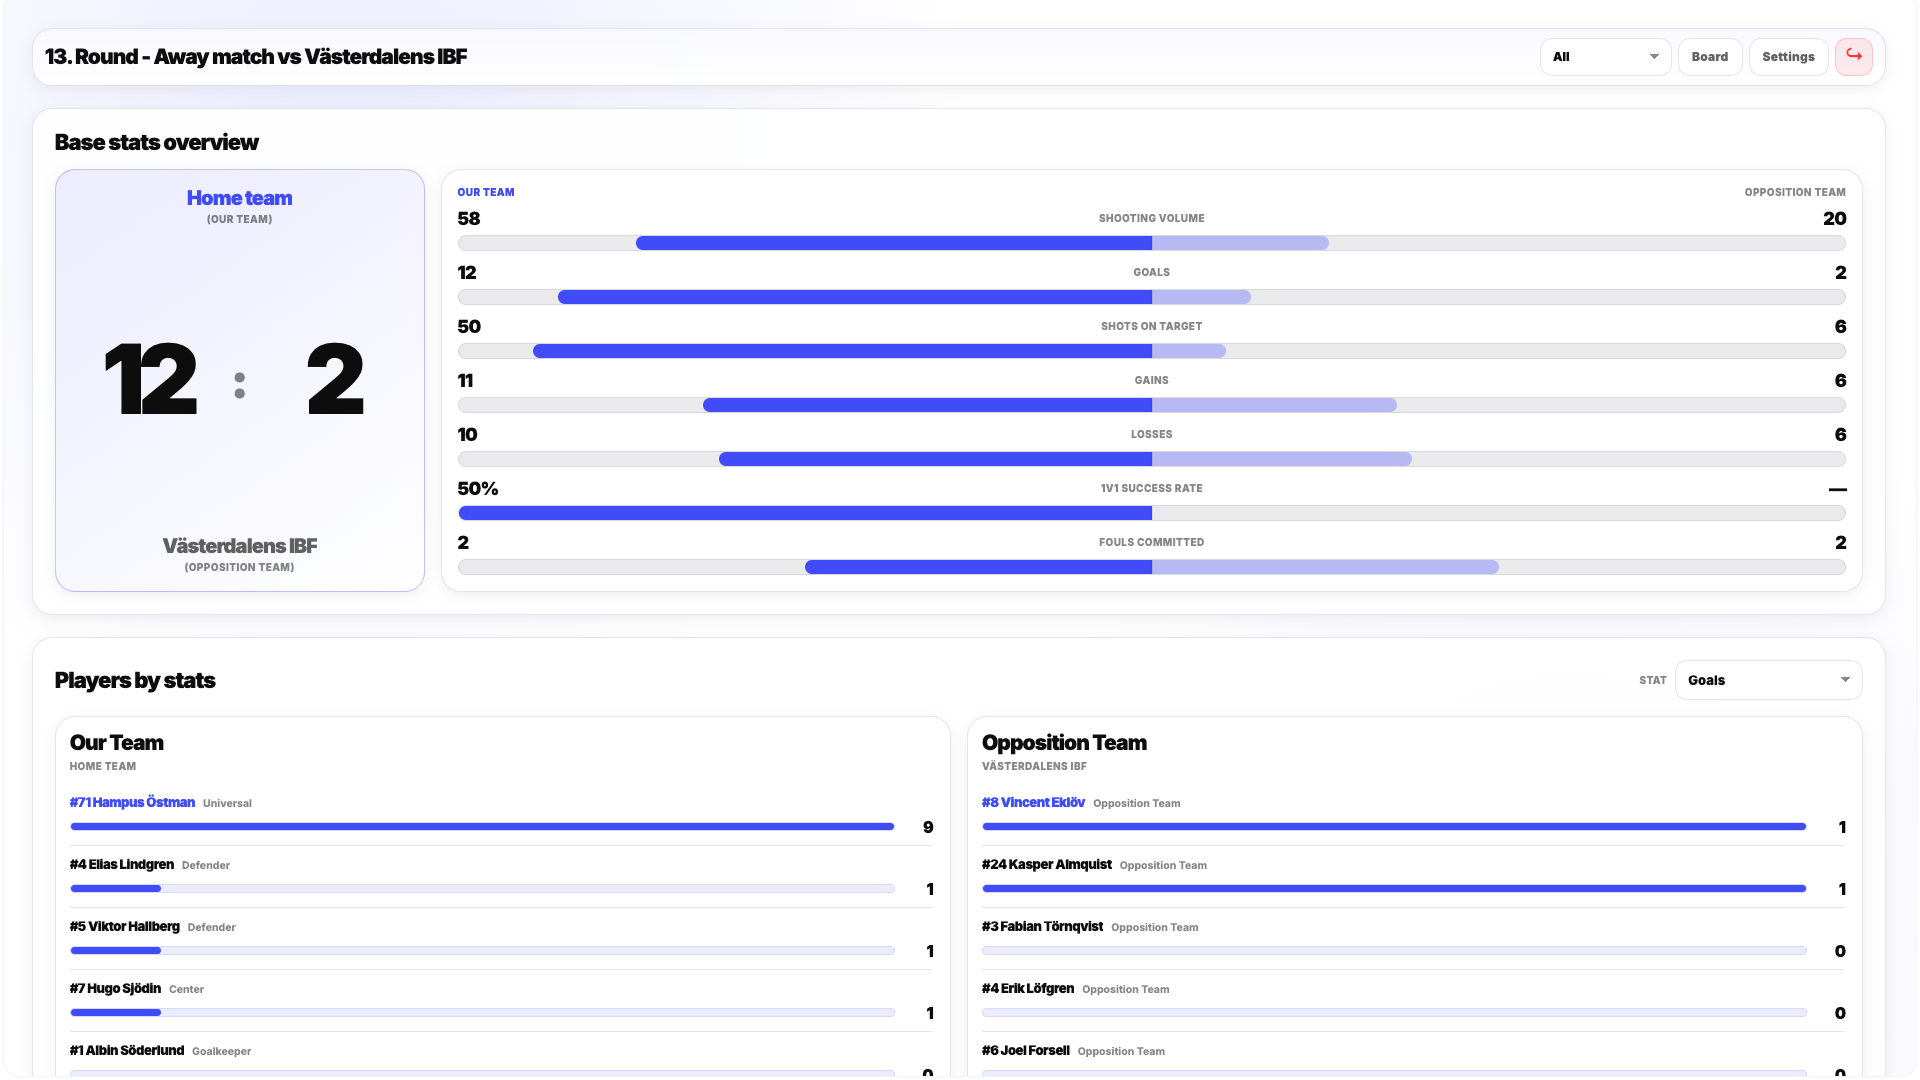
Base Stats Overview
Base Stats Overview shows the current score together with a head-to-head comparison of both teams.
The section includes key metrics such as:
- Shooting Volume
- Goals
- Shots on Target
- Gains
- Losses
- 1v1 Success Rate
- Fouls Committed
The purpose of this section is to provide a fast summary that can be read during the match without having to examine a full statistical table.
Players by Stats
Players by Stats shows individual players according to the selected statistic.
Use the Stats dropdown in the top-right corner to choose the metric.
Approximately 25 different statistics are available.
This allows you to quickly identify which players are producing the highest values in a particular area during the current match.
Statistics
The Statistics section provides a more complete team-level view of the match.
Use the Team dropdown to switch between:
- Our Team
- Opposition
Statistics are grouped into areas such as:
- Shooting
- Possession
- Progression
- Duels
- Defense
- Discipline
This gives you access to more detail when the Base Stats Overview is not enough.
Event Feed
Live Analysis also contains Event Feed.
It provides an overview of the events already recorded during the match and works as an additional reference alongside the statistical sections.